


Most of us uses Microsoft Teams on a daily basis, and we post a lot of messages, chats, contents to the platform. However there are times that you may need to post these contents automatically. Here in this post, we will see how we can post content to channel in Microsoft Teams using Python. Let’s get started.
Prerequisites
- You will need Python installed on your machine
- You will need to create a Team and a channel in the Team
Setting up a channel
Creating a channel
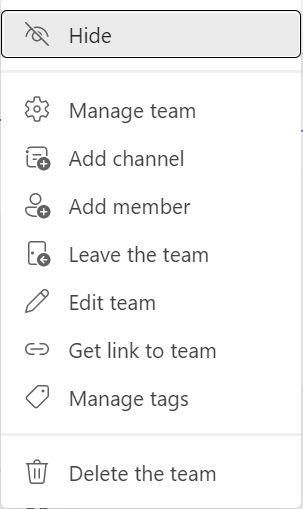
You will need to set up Teams before you create a channel, and if you have enough access, it is an easy thing to do. Once the Team is ready to use, you can either use one of the existing channel, or create a new one from the context menu.
Setting up the connector
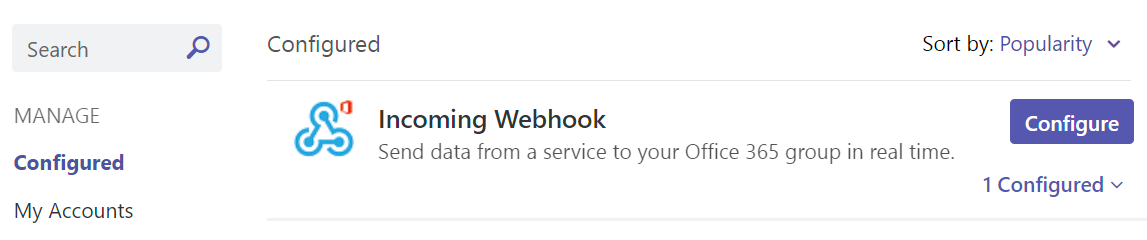
When you have decided which channel to use, click on the three dot on the right-side of your channel name, and then click on the Connectors and then search for the connector “Incoming Webhook” and then click on the button “Add”.
The above process might take a few minutes. If you are unable to perform this, you can try using the web version of Microsoft Teams.
Use of web verstion of Microsoft Teams
The above step will add the connector to your Teams, so that you can start configuring your Webhook. Click on the Configure button.

Provide a meaningful name for your Webhook and upload an image if required. Finally click on the Create button. A unique Url will be generated for your Webhook. Copy the Url and save it somewhere, we will later add this to Azure Key Vault and use from there. Click on the Done button. Your Webhook now should be shown as configured.
Post Message Using the Connector
Setting up Azure Key Vault
Configuring the Azure Key Vault is as easy as you set up any other Azure Resource. You may get the steps required from this post or this. Add a new secret and paste the Webhook Url value you copied earlier.
Make sure that you had set up the Access Policies on your Azure Key vault.
Access Policy
Copy your Azure Key Vault name and the Secret name, we will use this in our Python function.
Setting up Python Application
Let’s set up our Python application. Create a directory msteams-webhook and create a file requirements.txt with the preceeding contents.
pymsteams[async]
azure-identity
azure-keyvault-secrets
Now run the commands below to create a virtual environment, activate the environment and then install the requirements in our environment. If you get a message like “WARNING: You are using pip version 19.2.3, however version 22.2.2 is available.”, you can upgrade pip by running the command python -m pip install --upgrade pip
py -m venv .venv
.\.venv\Scripts\activate
py -m pip install -r requirements.txt
You can learn more abou the Virtual Environment here.
Python Virtual Envrronment
Get the Secret from Azure Key Vault
Let’s create a new Python file keyvault_helper.py with the codes below.
Send Message to Teams Channel
To send a message to the Teams channel, we are going to use a package pymsteams. This has been already added to our requirements file. Let’s create a file notify_teams.py with the codes below.
As we have all the set up done, let’s create main.py file with the codes below to start sending the messages to the Teams channel.
Before you run the main file, make sure that you have logged in to the terminal using az login with the account that you had set the access policy in your azure key vault. We can also set this access policies by using a managed identity, or a service principal, so that we can use it for more production scenarios. But for this post, let’s stick with a user account.
If you get the error,
Keyvault ErrorVisualStudioCodeCredential: The current credential is not configured to acquire tokens for tenantorSharedTokenCacheCredential: The current credential is not configured to acquire tokens for tenantyou can set the valuesexclude_shared_token_cache_credential=Trueorexclude_visual_studio_code_credential=Truewhen you get tokens usingDefaultAzureCredentialin yourget_key_vault_secretfunction inkeyvault_helper.pyfile.

By this time, we can hope that you will be able to get the secret from the key vault and now we can execute py .\main.py file. Once the file is executed, you should get a response in your cli as preceding.
{"version":"1.1","content":{"headers":[{"key":"Content-Type","value":["text/plain; charset=utf-8"]}]},"statusCode":200,"reasonPhrase":"OK","headers":[],"trailingHeaders":[],"requestMessage":null,"isSuccessStatusCode":true}You should also get a message on your Teams channel.

Source Code
You can also see the codes in this repository.
About the Author
I am yet another developer who is passionate about writing and video creation. I have written more than 500 blogs on my blog. If you like this content, consider following me here,
Your turn. What do you think?
Thanks a lot for reading. Did I miss anything that you may think is needed in this article? Could you find this post useful? Kindly do not forget to share your feedback.
Kindest Regards
Sibeesh Venu